For the complete documentation index, see llms.txt. Markdown versions of all docs pages are available by appending .md to any docs URL.
Secure the UI
Verified : Code examples on this page have been automatically tested and verified.Require users to log in to the UI with an OIDC policy on the gateway that serves it.
About
To require users to authenticate, apply a browser OIDC policy to the gateway that serves the UI. Unauthenticated requests are redirected to your identity provider (IdP) to log in, and only requests that pass the policies in ui.policies reach the UI.
The ui.policies section takes the same policies that a route takes, so you can also use JWT, basic, or API key authentication for programmatic access. To restrict which authenticated users get in, add an authorization policy alongside the authentication policy. To send the access decision to your own policy service, such as Open Policy Agent (OPA), use an external authorization (extAuthz) policy. The ui.policies section also accepts cross-origin resource sharing (CORS) and cross-site request forgery (CSRF) policies.
The oidc policy in ui.policies also accepts bearer ID tokens, so CLI clients can call the UI’s API without a browser session. The client sends an ID token from the same identity provider and client in the Authorization: Bearer <token> header. This default is credentials: sessionOrBearer. To accept only browser sessions, set credentials: session. For more information, see Bearer tokens for API clients.
Note
A policy in ui.policies applies only to the gateways that the ui section lists. It does not apply to the copy of the UI on the admin interface, which stays unauthenticated. That is safe by default, because the admin address is loopback-only, but it is a reason not to move it. For more information, see The UI and the admin interface are not the same thing.
Before you begin
- Install standalone agentgateway.
- Serve the UI on its own gateway. The examples on this page apply the OIDC policy to the
ui-gatewayon port4001that you created in that guide. - Set up an IdP, such as Keycloak or Microsoft Entra ID. Consider creating a client specifically for the UI, such as
agentgateway-ui. For provider-specific setup instructions, see the identity provider integrations.
Binary and Docker
You can add the policies in the UI or in your configuration file.
Whether the UI can save depends on your storage mode. For more information, see Save changes from the UI. UI access policies also require the UI to be on a gateway, such as the ui-gateway from Serve the UI on its own gateway.
Set the environment variables for the session cookie key and the UI client that you created in your IdP.
OIDC_COOKIE_SECRETis an AES-256-GCM key that agentgateway uses to encrypt session cookies. Generate 32 random bytes, encoded as 64 hexadecimal characters. If this key is missing, agentgateway does not start with anoidcpolicy.REDIRECT_URImust match the address that you serve the UI on, and it must be registered as a valid redirect URI in your IdP.
export OIDC_COOKIE_SECRET="$(openssl rand -hex 32)"
export ISSUER_URL=https://keycloak.example.com/realms/agentgateway
export UI_CLIENT_ID=agentgateway-ui
export UI_CLIENT_SECRET=<client-secret>
export REDIRECT_URI=http://localhost:4001/oauth/callback
Restart agentgateway from the same shell, so that agentgateway has these variables in its environment. In
hybridstorage mode, agentgateway needs onlyOIDC_COOKIE_SECRET, because you enter the other values in the UI as literals in a later step. In Docker, add-e OIDC_COOKIE_SECRET -e ISSUER_URL -e UI_CLIENT_ID -e UI_CLIENT_SECRET -e REDIRECT_URIto yourdocker runcommand. For the full command, see the Docker tab in the Config file tab.Open the Settings > UI page on the admin interface, such as http://localhost:15000/ui/settings/ui. The policies do not apply to the admin interface, so you keep access while you edit them. Confirm that the Public gateway dropdown shows
ui-gateway.In the UI access policies section, click the OIDC card, and configure the following fields. In
filestorage mode, you can enter environment variable references, which agentgateway expands when it loads the configuration. This way, the client secret is not written into the file.In
hybridstorage mode, agentgateway stores the values as you enter them and does not expand environment variable references, so the screenshots and the following references do not apply. Enter the literal values instead, which also stores the client secret in the database. To keep the client secret out of the database, set the OIDC policy in your configuration file as shown in the Config file tab. A reference in the Issuer field fails the save with an error such asinvalid discovery uri derived from issuer '${ISSUER_URL}'. For more information, seehybridmode.- Issuer:
${ISSUER_URL}, or inhybridmode, your issuer URL - Client ID:
${UI_CLIENT_ID}, or inhybridmode, your client ID - Client secret:
${UI_CLIENT_SECRET}, or inhybridmode, your client secret - Redirect URI:
${REDIRECT_URI}, or inhybridmode, your redirect URI - Additional scopes: Click the
profileandemailsuggestions.
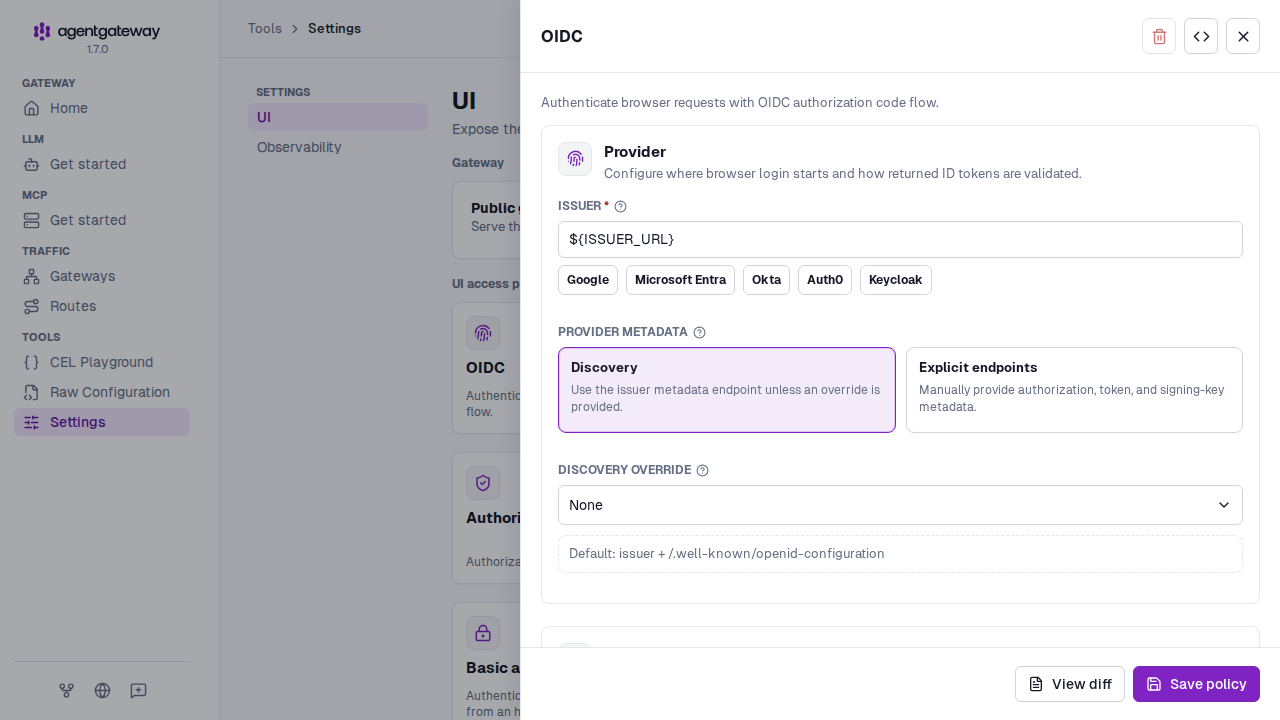
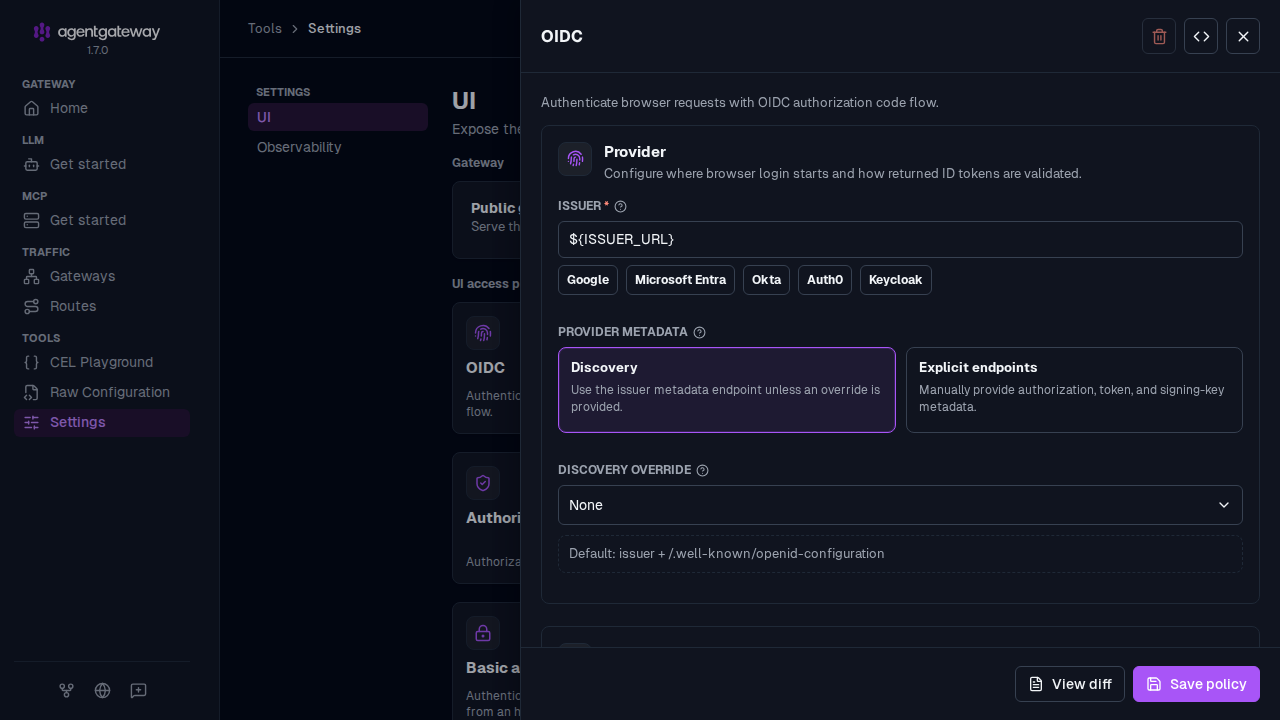
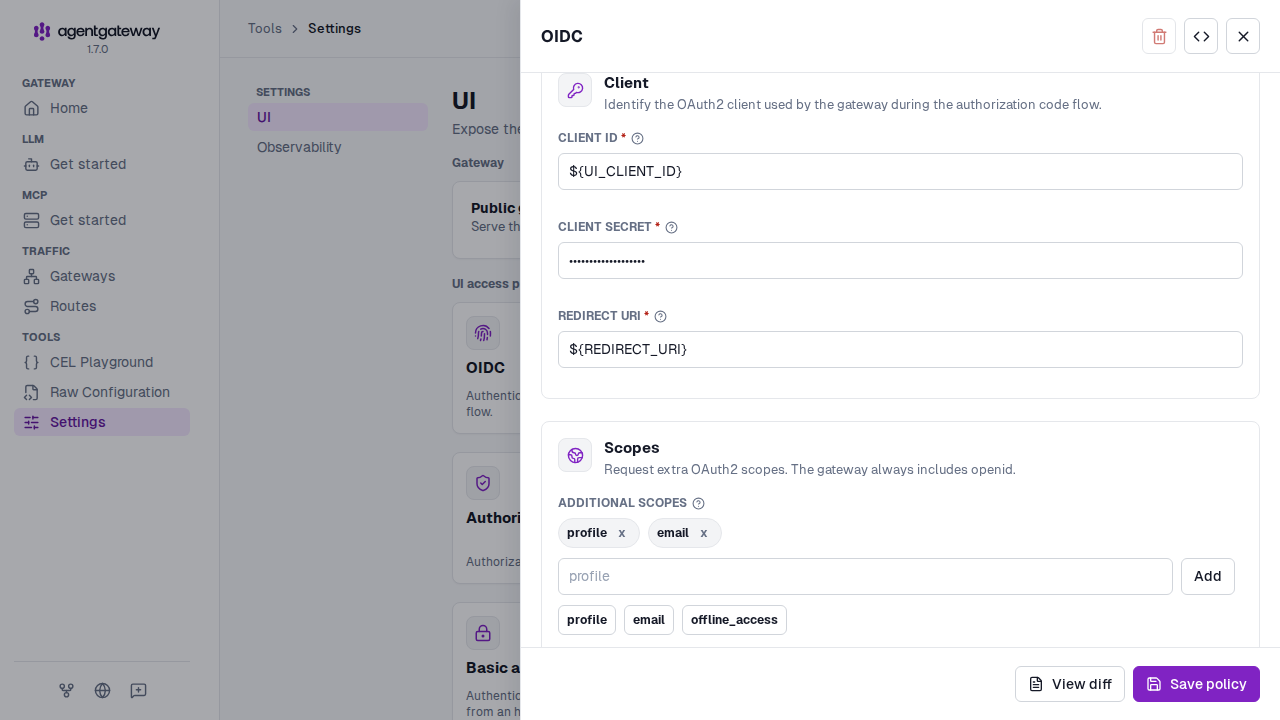
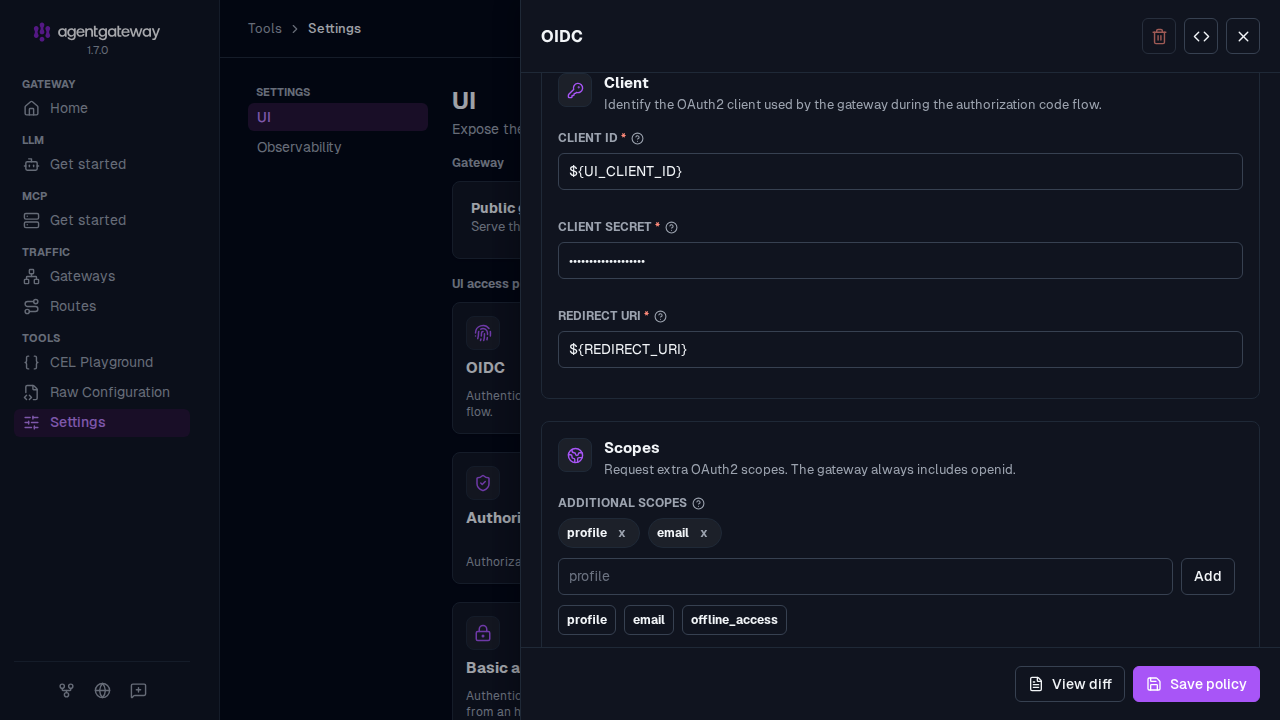
- Issuer:
Click Save policy. The save fails if agentgateway cannot fetch the OIDC discovery document from the issuer. In
filestorage mode, the save also fails if a referenced environment variable is not set.Optional: Restrict access to users whose email address ends in
@example.com.- Click the Authorization card, and click Add rule.
- Keep Allow as the effect, and replace the example expression with
jwt.email.endsWith("@example.com"). - Click Save policy.
Open the UI at the gateway’s address, such as http://localhost:4001/ui/. Instead of loading the UI, agentgateway shows a Sign in page. Click Sign in with SSO to log in with your OIDC provider. After you authenticate, you are returned to the UI.
Helm
Save the details of the UI client that you created in your IdP as environment variables. The redirect URI must match the address that you expose the UI on, and it must be registered as a valid redirect URI in your IdP. If you plan to expose the UI on a hostname, use that hostname now so that you do not have to register a second redirect URI later.
export ISSUER_URL=https://keycloak.example.com/realms/agentgateway
export UI_CLIENT_ID=agentgateway-ui
export UI_CLIENT_SECRET=<client-secret>
export REDIRECT_URI=https://agentgateway.example.com/oauth/callback
Create a Secret that holds the session cookie encryption key and the OIDC client secret.
After a user logs in, agentgateway keeps the session in a browser cookie that it encrypts with the session cookie encryption key. The key is a random value that you generate, not a value that your IdP gives you. Agentgateway requires an AES-256-GCM key, which is 32 random bytes that are encoded as 64 hexadecimal characters. Agentgateway refuses to start when an
oidcpolicy is set and this key is missing or is not that length.kubectl create secret generic agentgateway-ui-secrets \ -n agentgateway-system \ --from-literal=OIDC_COOKIE_SECRET="$(openssl rand -hex 32)" \ --from-literal=UI_CLIENT_SECRET="${UI_CLIENT_SECRET}"Note
You choose the Secret’s name, and you pass it to the chart in the
oidc.cookieSecretNamevalue in the next step. However, the key within the Secret must be namedOIDC_COOKIE_SECRET, because the chart reads that exact key. The client secret key can have any name, as long as theextraEnventry that you add in the next step refers to the same name. This example keeps both values in one Secret, but you can also keep them in separate Secrets. In that case, setoidc.cookieSecretNameto the Secret that holds the cookie key, and point theextraEnventry at the Secret that holds the client secret.Add the OIDC policy to the
uisection, point the chart at the Secret, and pass the client secret to the pod as an environment variable.Set the chart value
oidc.enabled: trueto injectOIDC_COOKIE_SECRETfrom the named Secret. Setting onlyoidc.cookieSecretNamedoes not inject the key, and agentgateway cannot start with an OIDC policy without it.The heredoc in this step is unquoted, so your shell substitutes the issuer, client ID, and redirect URI as it writes the file. The
\$UI_CLIENT_SECRETreference is escaped, so it stays in the file as a literal$UI_CLIENT_SECRETthat agentgateway resolves from the pod environment at startup. This way, the client secret stays in the Secret instead of the ConfigMap.cat <<EOF > values.yaml config: gateways: default: port: 4000 ui-gateway: port: 4001 ui: gateways: [ui-gateway] policies: oidc: issuer: ${ISSUER_URL} clientId: ${UI_CLIENT_ID} clientSecret: \$UI_CLIENT_SECRET redirectURI: ${REDIRECT_URI} scopes: - profile - email routes: - matches: - path: pathPrefix: / backends: - host: httpbin.httpbin.svc.cluster.local:8000 oidc: enabled: true cookieSecretName: agentgateway-ui-secrets extraEnv: - name: UI_CLIENT_SECRET valueFrom: secretKeyRef: name: agentgateway-ui-secrets key: UI_CLIENT_SECRET EOFUpgrade the release with your values file.
helm upgrade -i agentgateway-standalone \
  oci://cr.agentgateway.dev/charts/agentgateway-standalone \
  --namespace agentgateway-system \
  --version v1.7.0 \
  --reuse-values \
  -f values.yaml
Confirm that the pod is running.
kubectl get pods -n agentgateway-system \
  -l app.kubernetes.io/name=agentgateway-standalone
Port-forward the UI port again, and confirm that an unauthenticated request is redirected to your IdP.
kubectl port-forward -n agentgateway-system \
  deploy/agentgateway-standalone 4001:4001
curl -s -o /dev/null -D- http://localhost:4001/ui | grep -i locationExample output:
location: https://keycloak.example.com/realms/agentgateway/protocol/openid-connect/auth?response_type=code&client_id=agentgateway-ui&...
Important
Agentgateway fetches the OIDC discovery document at startup, so the issuer must be reachable from the pod. When the fetch fails, the pod does not start, and the logs report failed to decode oidc discovery response from uri. If the pod enters CrashLoopBackOff after you add the policy, check the issuer URL and any egress restrictions.
Choose what users can do
The policies in ui.policies decide what users can do after they log in, so you can match UI access to the teams in your IdP. Each request to a UI page or the UI API passes through the policies. By default, a user who logs in gets full access, which suits a small team of administrators. Full access includes saving configuration changes, managing all virtual keys, and editing ui.policies.
To give different users different access, choose one of the following options.
| Option | Effect |
|---|---|
| Authorization rules | Define your own roles from IdP claims, the request method, and the request path. For example, one group can save changes, and every other user can view. For more information, see Set up an admin group. |
extAuthz policy | Your own authorization service, such as OPA, decides each UI request with any per-user rules that you write. For more information, see External authorization. |
readOnly storage mode | Every user can view the UI and all configuration changes go through your configuration file. For more information, see Configuration storage. |
Set up an admin group
Add allow rules to the authorization policy in ui.policies to let one group of users save changes while every other user can view. The following example gives members of the agentgateway-admins group full access. Before you add the rules, check that your IdP adds a groups claim to the ID token. Without the claim, the group rule does not match, and saves from the UI on the gateway return a 403 response. The claim name and the group names depend on your IdP configuration.
The example uses the following rules.
| Rule | Effect |
|---|---|
"agentgateway-admins" in jwt.groups | Members of the group have full access, including saving changes. |
request.method == "GET" | Every other user can open the UI pages and read the configuration, including any secrets that the configuration file stores inline, such as virtual keys, provider API keys, and OIDC client secrets. To hide secrets, narrow this rule to the paths that users need, or use an extAuthz policy. |
request.path.startsWith("/api/logs/") || request.path == "/api/cel" | Every other user can also search and stream request logs, view analytics, and use the Common Expression Language (CEL) playground. These pages query data with POST requests, so this rule includes them in view access. |
In a Helm installation, port-forward the admin port.
kubectl port-forward -n agentgateway-system \
  deploy/agentgateway-standalone 15000:15000
Open the Settings > UI page on the admin interface, such as http://localhost:15000/ui/settings/ui.
In the UI access policies section, click the Authorization card.
For each rule in the table, click Add rule, keep Allow as the effect, and enter the expression.
Click Save policy.
Verify the rules
- Log in to the UI on the gateway as a member of the
agentgateway-adminsgroup, and save a change to verify that the group rule matches. If the save returns a403response, check the name and values of thegroupsclaim in your IdP, and update the rule. - Log in to the UI as a user outside the group, and verify that you can browse the UI. When you save a change, the gateway returns a
403response, because only members of the group can save changes, including changes toui.policies.
Choose how users are identified
Agentgateway identifies the user of each request with the agentgateway.user attribute. Request logs, analytics, and virtual key owners record this value. By default, the value comes from the first of the following sources that has a value:
- The metadata of a virtual key, in this order:
agentgateway.dev/owner,user,name, thenowner - The
subclaim, then theemailclaim, of a JWT or an OIDC session - The username of a basic authentication request
- The client identity of a mutual TLS (mTLS) connection, such as the workload identity or the common name of the client certificate
You choose which value identifies your users. Many IdPs set the sub claim to a stable ID, such as the UUID 1ed4bac1-9a81-4867-a81f-04cfc58bf0b2 in Keycloak. To record email addresses instead, set the user attribute to the following CEL expression.
Your expression replaces the whole default order, not only the JWT part. For example, if you set the attribute to jwt.email alone, requests that use a virtual key no longer record a user. Key owners then stop appearing in request logs. The following expression keeps the default order and checks the email claim before the sub claim.
coalesce(apiKey["agentgateway.dev/owner"], apiKey.user, apiKey.name, apiKey.owner, jwt.email, jwt.sub, basicAuth.username, source.identity.namespace + "/" + source.identity.serviceAccount, source.subjectCn, null)- Open the Logs page, and click Settings.
- In the Request log identity section of the Log settings drawer, enter the expression in the User attribute field.
- Click Save settings.
You can set the field to any CEL expression that returns a string. The account menu shows the user’s name and email address from the name (or preferred_username) and email claims, so your expression changes the menu only when the token has neither. For an OIDC session, if your expression returns no value, agentgateway uses the sub claim instead, so the account menu and Sign out stay available.
Verify the changes
Open the /api/runtime endpoint in the browser where you are logged in to the UI, such as http://localhost:4001/api/runtime. The subject field of the user object shows the value that agentgateway records for your requests.
"user": {
  "subject": "alice@example.com",
  "name": "Alice Admin",
  "email": "alice@example.com",
  "canLogout": true
}
Authenticate CLI access
To call the resource API of the UI from the command line, configure an agctl connection profile with an exec credential plugin. The authentication policy of the API must accept the credential that the plugin returns, such as a JWT bearer token. A browser OIDC session does not authenticate CLI requests.
To verify the connection, run agctl standalone --gateway <profile-name> get all. Set the URL of the profile to the authenticated gateway, without /ui or /api. The admin address remains a separate access path without authentication, as described earlier on this page.
Next steps
Expose the UI on your own HTTPS hostname, now that a login is required.
Choose where configuration is stored so that the UI can save your changes.
See who owns each virtual key and how the owner affects request logs.